Backpacking Trip Guide for Beginners | Backpackers Trip

Every now and then, we wish to step aside from the hullaballoo of the city and just be one with nature. So, why don’t we pick up all our essentials and march on? It’s not as easy as it sounds. That’s probably why you’re here, going through this backpacking trip guide, to see how it’s done.
For people like us who can’t go through a single day without toilet rolls, backpacking is a huge deal. It requires months of planning, bags of money, and, most importantly, an ironclad commitment to stick to the end of the journey.
However, it doesn’t have to be like this. You can’t learn driving with a truck. New backpackers can start small. I say, if you’re a beginner, start with camping in your backyard to see if you’re really up for it. And it doesn’t have to cost so much either.
Our backpacking experts from Backpackers Trip have come up with this in-depth backpacking guide. We tried to make this article a complete guide to backpacking. So, stick around if you’re planning your next trip.
Plan Everything You Need
To go on a journey or to lead an invasion, planning is the key. It’ll decide whether your trip will be a blast or a flop. Nature is quite uncertain, but there are things you can prepare for.
There’s a lot of question regarding the trip that needs to be answered. Like where am I going to stay? What will I eat? How shall I prepare the food? I am a thorough planner myself, and that’s why I discussed the parameters of the trip that you should consider in detail.
1. Set the Date
Your journey starts with a single step – picking a date for the journey. If you choose the local campsites, you have to check the weather for a nice and sunny day for a camping trip. You should also think about the duration, how long the trip will last.
It’s safer to pick dates in January because you’ll have a large selection of spots to choose from. These dates should be determined through discussion with your journey companions.
2. Pick the Landscape
The things you need to consider here are – how long will the trip last and how far you wish to travel.
For Beginners
If you’re just starting, it’s imperative that you don’t go far.
The logic is simple; you know where to get all the necessary information about a spot that’s near your house. And of course, if you are familiar with the terrain, it’ll be easier for you to explore it. To choose the best spot, you need to consult with the locals or experienced hikers that have visited the spot.
For your first trip, you must pick an established hiking spot. It doesn’t have to be far or high. Remember, you can get the thrill anywhere. Established spots have pretty much everything you need for a great time outdoors.
Sites near springs, rivers, or waterfalls are convenient because you have a source of water that you can use. The nearby campsites can be a great start if you want to shift gears and be a backpacker.
One last thing, make sure not to bring kids with you. They might not be ready for life outside.
For Professionals
Your choice of destination is limited by the weather. If you’re planning to head out in the summer, why not travel to somewhere cold, like in the mountains? In January, you’ll have more options.
No matter where you’re traveling to, make sure you do your homework on the topography. You should plan a backpacking trip far away for at least a couple of months. There’s a lot of things you need to look out for, like established campsites, water resources, correct maps of the area, etc.
While you’re at it, look at you and your group members. Are you guys fit enough for this trip? You should choose destinations carefully based on your abilities. It’s nice that you’re looking for a challenge, but you should consider your physical limits first.
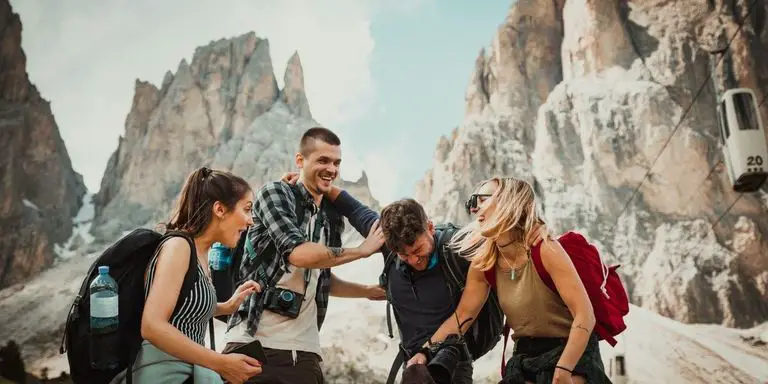
3. Invite Companions
If you like to travel alone for the challenge, this doesn’t apply to you. Beginners should travel in groups. The challenge becomes easier with responsible companions, and the fun gets almost doubled. You won’t have to carry all the stuff, just split the baggage among yourselves.
If you can’t find or persuade people to go with you, fret not. You can always find a local travellers community who’ll be more than happy to accompany you.
4. Make Travel Plans
Okay, you’ve selected a site and made people come with you. How are you going to get to your destination? If you need to fly there, better buy the plane tickets first. It’s important to find a reliable airline that’ll give you the tickets at a good price.
If you need to drive to your location, you need to think about where you park the car and whether it’s safe. That’s why I believe sites near your home should be chosen for beginners. A simple bicycle can take you there, and you can carry it with you.
5. Gear Up

This is the step where it’ll get really hectic, buying the stuff you’re going to bring with you. The first thing you have to do is make a checklist of the essentials you must take. Then browse online to get the best price. If you don’t have a clue what you have to put in your backpack, we got your back!
Shoes or Sandals
What type of shoes, boots, or sandals you have to pick depends on the terrain you’re going to land on. If you need to walk for miles, hiking shoes can offer you the best comfort, versatility, and water protection. You can also consider trail running boots for hiking.
Durable strap sandals are perfect for hiking. You can keep them on after walking all day. If you’re going to choose shoes, then you should also buy a pair of crocs or camping shoes to wear at night in the camp. Those smelly shoes you wore the whole day will not make your nights better.
If you’re planning to visit a snowy mountain, the winter boots are a must. For topical regions where it rains a lot, never leave your tent without your rain boots.
Backpack
This is the first thing you’ll search for after committing to backpacking. Backpacks come in all shapes and sizes. The weight of the backpacks is another thing that has to be considered.
Heavy-duty backpacks are very durable and perfect for rough terrains. But they’re heavy and therefore, short or scrawny guys should definitely search for a more lightweight option such as a frameless bag. They’ll even work as pillows or bolster!
In case your backpack gets dirty from the last trip, it’s better to wash it; here’s how to easily wash a backpack.
Sleeping Bags or Pads
Between sleeping bags or pads, whichever you prefer, has to be comfortable and easily foldable so that they take up a small space in your backpack. If you prefer sleeping pads, you will have to buy the best backpacking pillow too, whereas sleeping bags are a complete package.
Tents
This is an absolute necessity to protect you from wild animals and rain. You have to look for tents that are big and spacious and will fit right in your backpack. Just buying one isn’t enough; you have to know how to put up a tent.
Lanterns or Flashlights
Flashlights are a must for camping at night. You can’t leave your tent without it. These have to be strong and durable enough to take some nasty hits and come out unharmed. Purchase enough batteries that’ll last the whole trip.
Trekking Poles
These bad boys stand guard and stabilize your tired and exhausted body while you walk. They have to be lightweight and durable.
Animal and Bug Repellent
You’re going to be camping and sleeping outside a lot. It’s smart to take bug spray with you to get rid of nasty insects and flies that’ll ruin the sleep. Not only that, the wild animals like bears or raccoons might smell the leftovers you ignored near the fire. Spray beast repellents to prevent their raids.
Kitchen Appliances
You need to be smart with this one, or you’ll end up with stuff in your backpack that you won’t need.
Camping stoves can be carried if they weigh under a pound. Also, you have to choose between gas and liquid fuel stoves. Gas fuel stoves are easier to light, no priming required. But you won’t have many options to choose from, and you might not find a refill in the region you’re travelling to.
Liquid fuel stoves are more versatile, and the fuel itself is easier to find. The fuels can burn dominantly in colder regions. But the stoves require proper handling and maintenance. You should also consider stoves that can burn dry leaves and twigs. Finally, the choice of stove comes down to the widely available fuel of the region.
Speaking of fuel, you also have to accurately calculate how much fuel you’re going to take, keeping in mind the consumption of fuel while cooking the frozen foods, preparing the morning coffee, heating or boiling water, etc.
What about the utensils? Take only the mugs, pots, pans, spoons, or plates you need. Because if you take too much, not only they’ll add extra weight, you’ll have to wash them later.
NEVER leave for a trip without water purifiers and water bottles! The last thing you want is to be sick on foreign land in the middle of a journey. Take a high-performance water purifier and wash the bottle with clean and safe water.
Clothes
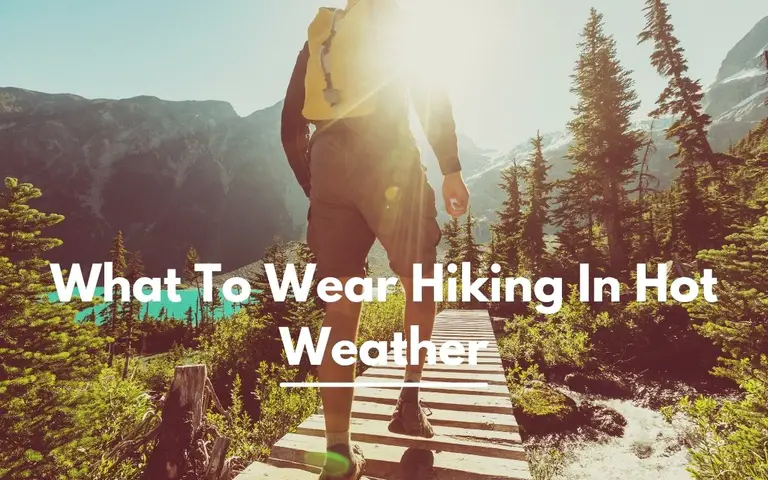
Like shoes and boots, these also depend on the weather of the terrain. No matter where you’re going, long-sleeved shirts are a must. They can protect you from the sun and bugs. The underwear and pants have to be made with fabrics that soak moisture and dry fast.
If you’re backpacking to a cold and snowy terrain, be sure to take a warm insulated jacket.
First Aid and Hygiene Product
Be ready for everything. Bruises and injuries can slow you down and lead to infections if not treated quickly enough. Take a first aid kit with you containing bandages, antiseptic products, gauges, medical tape, painkiller, antibacterial meds(prescribed), etc. They’re a lifesaver in these conditions.
Don’t forget to pack toilet paper for your trip. Other sanitation products include a toothbrush, toothpaste or mouthwash, biodegradable soap, tampons for ladies, hand sanitizers, etc. Things can get pretty dirty out in the wild. So, pick one or two bags of wet wipes or towels with you if you can’t get water to wash with.
Navigation Kits
These would help you move around and direct you to safety if you got lost somewhere. Collect an updated map of the terrain you’re traveling to. The compass you’ll carry has to be accurate and durable. There’s no guarantee that a GPS will receive wireless signals there.
Keep a waterproof sports watch with you, and remember to match the time zone with the locality. Having an SW radio really helps to kill the time listening to local broadcasts and also keep track of weather alerts.
Miscellanies
A knife, car keys, locks, permits, credit cards, IDs, etc. are must carry items, I might add.
6. Pick Food Items
Nothing ends the day more perfectly like sitting beside a fire, smelling the curry being prepared after hiking for a long time. You might complain about them being nothing like the homemade turkey or grilled cheese sandwich. Yet, in reality, you’ll miss these frozen foods and the memories once you get home.
Pick food items that’ll not only fill the belly but also go well with your empty stomach and not upset it. Simple healthy items like curry, pad thai, the salad should occupy the top of your list.
Breakfast
Try not to pack anything heavy for breakfast. Oatmeal, rice cereal, pie, instant coffee, etc. should suffice.
Lunch
After walking for hours, you’re bound to be starving for lunch. It’s important not to gorge in excess calories. Pick frozen tuna, salami, etc., which shouldn’t be too heavy and are easy to prepare. The key here is picking varieties because sometime, even hunger can’t beat the boredom of eating the same thing again and again.
For detailed planning, here’s a few awesome Backpacking Lunch Ideas!
Dinner
For dinner, you can take time and heat up tasty stuff like frozen, dried meat, rice and curry, bean and chili, spaghetti, ramen, etc. Go for spicy food if your stomach agrees with you. You should also pick powdered drinks to wash the dinner down.
Snacks
While trekking, you can get hungry. There’s not going to be enough time to stop and cook food, so pack snacks like granola bars, oat snacks, candy, dried fruits to beat that hunger.
7. Leave No Trace

Leave no trace stands on 7 principles of ethics you need to follow when you’re backpacking. Nobody wishes to camp at a dirty, disorganized campsite. It ruins the fun. We have to be responsible and leave the site in a clean state so that other campers can have their moments too.
These are the six principals you need to keep in mind before travelling to an established campsite:
Plan Ahead and Prepare
You need to have a good idea about the terrain and pack accordingly. Are there any inclement extreme weather alerts like blizzards, flash floods, etc.? If there are, prepare for them. Check what you’re allowed and not allowed to take.
Schedule in non-peak times where there’ll be fewer people hiking with you. Travel in small groups to minimize the wastage. It’s smart to repackage so you can use the stuff later.
Travel and Camp on Durable Surfaces
The main idea here is to stick to established campsites in familiar or popular places. These terrains are resilient and can take the load of campers.
In popular places like parks, ranges, there are specific camping spots. Camp on those sites and don’t go off the trail if you’re a beginner. They’re safe and have essential facilities nearby like water, medication, etc.
It’s important to minimize your footprint. Nobody wants to see poop or tampons thrown here and there. So, following an effective waste disposal system is imperative.
Dispose of Waste Properly
For biodegradable wastes like veggies, leftovers, poop, biodegradable towels, you have to dig a hole on the ground and hide it. Nature will take care of the rest.
Don’t wash clothes with detergent unless you really hate dirt. You’re in nature; you can’t worry about getting dirty. So, wash the clothes with water. Detergents don’t degrade in the water easily.
You can’t leave the dishes dirty for obvious reasons. If you can’t get rid of the food stains with water, use biodegradable soap. Drag water from the stream and do your thing. If the soap falls on the surface water, it’ll cause algal bloom and ruin the aesthetics of the site in the long run.
Respect Wildlife
If your camping spot has wild animals, steer clear of them. They’re more afraid of you. Don’t try to chase them away; otherwise, they might retaliate. Wild animals have their own supply of food, so don’t try to feed them either.
Most importantly, respect the ecosystem they live in. Pick up non-biodegradable trash and dispose of them when you find a dumpster.
Minimize Campfire Impacts
While camping is definitely fun, try not to go overboard and create a large campfire since they’re tough to control. Use the dry leaves or twigs as fuel; you’re also cleaning up nature in the process.
Be Considerate of Other Visitors
While having a lot of people around is not necessarily a bad thing, it takes the fun away if you’re camping just to stay away from people. With that being said, we should act respectfully and responsibly towards others. Use your best judgment while dealing with other campers.
It’s important not to make a lot of noise to let the soothing sound of nature prevail. If you have a pet accompanying you, control it.
Treat people like you wish to be treated. You may keep your backpacking merit badge on show so others especially newcomers can ask for help. Here’s How to Sew a Patch on a Backpack – Easy Steps!
8. Share Your Plans with Your Close Ones
If you’ve come up with a detailed itinerary of your travels, share it with your close ones. Thus, they’ll be well informed of your whereabouts and take action if you’re having any troubles.
9. Recheck All the Gear
So, you’ve bought or loaned all this stuff. I trust that you’ve checked before you bought them. But you can’t be too sure. Do check the gears again before you’re leaving, so you don’t have to deal with malfunctioning equipment on the trip.
How to Not Go Broke?
People spend thousands of dollars for a 3-day backpacking trip; some even get cold feet just by seeing the bill receipt. Having fun doesn’t necessarily have to break the bank. There are simple things that you can do to save money. Here’s how to save money for backpacking;
1. Choose a Budget-Friendly Destination
In the case of camping, distance does not equal fun. Meaning, you don’t have to go far like a new country or island, etc. just to have some quality time by yourself or with friends. So, choose a place that’s not far. You can walk there or ride a bike; this will save car fuel. FYI, if you plan to go for a bike, do pack for bikepacking!
If the trail is familiar, you’ll know what you’re going to need instead of relying on hunches. That’ll save you from overshopping. Choose places where it’s free to enter. Or you can backpack in the offseason to get the discounts and great deals on entry and other facilities.
2. Walk More
Spend more time walking than driving. You’ll have more time to enjoy the view and cut the fuel cost in half!
3. Bring Home-cooked Meals
For a day trip, you don’t need to buy frozen foods from the grocery stores. You can cook and pack food in airtight containers to make them last longer. It’ll take a bit more effort, but you’ll save a lot by sun-drying the fruits yourself. If you’re a coffee person, you can brew your own instead of buying instant coffee.
4. Don’t Buy, Rent
If you’re a beginner, buying all those expensive gears makes no sense. You’ll spend half the time wondering why you bought all those, and damage them quickly if you don’t know their proper handling and maintenance.
Many organizations on social media loan backpacking equipment along with training classes on how to use them. That’ll cut down the cost of your first trip.
5. Bring Your Drink
Won’t lie, I’m not a big drinker. That’s why I found it easy to save money on road trips. But cracking a Corona with your buddies at night near a fire sounds fun, doesn’t it? Stopping at bars to pick up drinks will be too expensive. Why don’t you bring your own?
How to Pack a Backpack?
Your backpack is more than enough to hold all your stuff, even for the longer hikes. You just need to know the smart way to pack. If you’re techies or IT professionals You may also read; What to Pack in Your Tech Backpack– We’ve covered everything so that you don’t miss any of your gadgets.
Sacks
I didn’t know why there were so many straps and sacks. Although straps are not relevant to ‘packing’ actually, I’ll tell you why you need them. First, let’s deal with the sacks.
The frontal sack is for your daily essentials like toothpaste, snacks, powders, balms, ointments, phone, chargers, etc. You’ll need them frequently, so the sack exists. Load this stuff in the sack so that you can get them whenever you want.
If you also have a hip-belt pocket, you can store some of these essentials there. You should also have water bottle pouches on both sides of the backpack.
Straps are mainly there to attach the backpack tightly with your body and minimize its movement. For example, shoulder straps bind the backpack to your shoulders. The compression straps join the sides of the backpacks with the shoulder straps. You can lift the bag with the collar strap.
With the hip-belt strap, you can bind the lower portion of the bag tightly with your hips. Load lifters join the top of the backpack closely with the shoulder straps to add extra support.
Lower Portion
This part of the backpack should hold the stuff you won’t need right away. The best stuff for this part are sleeping bags, pads, clothes, or pillows. They’re lightweight, soft and can add comfortable support to your bum as you hike. Some bags have lower zips so that you don’t have to dig through all the stuff.
Middle Portion
The coolers, bottles, stoves, utensils, tools, medkit, camera, etc. go here. A lot of stuff qualifies to be here. Therefore, it’s the most spacious part of the bag. If you have extra clothes, you can squeeze them between the gears so that they don’t crash into each other. If you’re carrying camera and backpacking photography is something you like here’re some do’s and don’ts of backpacking photography you need to consider.
Top Portion
This part should hold the things you’ll need right away. You can store snacks here, but you should pack them on the side pockets. Because in my opinion, the gear that belongs here is the tent. In case of a sudden storm or rain, you need to put up the tent as fast as you can.
Tent poles can be slid along the sides of the bag to provide a nice backbone if you don’t have loops in the bags to hang them from.
How to Train for a Backpacking Trip?

After you decide to have a trip, ask yourself, are you truly ready both physically and mentally? Backpacking puts an immense strain on your body, and if you’re not fit enough, you’ll have to step down before reaching your goals. Hiking with an unfit physique will multiply the chances of bruising, injuries, and accidents.
But don’t worry, this senpai is here to train you before you go into this battle. This article will list some basic exercises that, if you follow daily, will whip you into shape in no time.
At this point, you should be committed enough to have developed an itinerary of your travels. That will help you with the numbers like how much weight you’ll carry, how many miles you’ll have to walk daily, etc.
If you know your abilities and limits, you’ll be able to set goals for yourself. The best way to do that is waking up every day and going out for a walk until you get tired. You can elevate your stamina every day until you reach your goals. Be careful not to rush this and pick up an injury before the hike even starts.
While you’re at it, test your limits by climbing any nearby hills at regular intervals. You shouldn’t strain your body too much. Give it a chance to heal and develop better resilience. Try exercising with weights on your back since you’ll be carrying that heavy backpack since day 1.
Do look into this Best EDC Backpack Buying Guide, since a good carrying bag will ease your experience with the weight.
The parts of the body that have to endure the most in these trips are Lung, Shoulder, Hips, Feet, Ankles, Legs, Abdomen, Back…so yeah, pretty much the whole body. Try these exercises to strengthen these parts.
Squats
If you want to prepare your body for lifting the backpack the whole day, there’s no better exercise than squats. Keep your legs parallel, be in a sitting position keeping the chest straight, then sit and stand up. Do this 20 times in sets of 2/3. You can jump up while standing to increase the lower body strength (jump squats). Watch this – How To Do Perfect SQUAT | SQUATS For Beginners
This will straighten up leg muscles and strengthen your back, aligning your posture as well.
Step Up/Heel Down
You’re going to do a lot of climbing up and down as well, mainly on rocks, logs, or boulders. Ready a step (can be anything, planks, craters, etc.) on the floor and put the left foot on it. Keeping your body and the right leg straight, lift up your body on that crater by straightening the left leg. Watch this: Step-Up – Heel Elevated – DB | KILO Exercise Database
When you’re done, hover the right leg on the side of the step and again, keeping the body straight, fold the left leg to get down. Do this for both the legs, 15 times for each one. This will bulk up your leg muscles.
Mountain Climbers
You need to be strong from the inside as well. I’m talking about lungs, abdomen, heart; this is where the strength comes from. This exercise builds up the core. Start with a plank position, keep your arms straight under your shoulders and bend one of your legs closer to your chest.
Switch for the other leg as well; do it 20+ times in sets of 3. Read ‘The New York Times’ Mountain Climbers Guide for better understanding.
Lunges
First, stand up straight. Lunge forward, leading with right leg ahead of the body and return. Take a step sideways with your right leg and return. Lunge backward exactly like the first step and return. Repeat for the left leg.
This will strengthen your quad muscles, which you will be relying on heavily while hiking. But don’t stretch the muscles more than it can. Getting a muscle sprain will be really painful and can mean the end of the trip for you.
You can try other exercises as well. It’s important to keep pushing yourself to your limit every day. Try this Lunges Workout Guide.
Backpacking Trip – Safety Precautions
Before you jump on an unknown trail, either solo or with friends, you need to think about every possible scenario. It’s better to take safety measures instead of facing them without preparations. These are a few safety details you need to think of before you head out.
1. Take Maps and Compasses
If you’re visiting a large trail, you must have a map with you. Don’t rely too much on smart technologies. You need to know how to read compasses as well.
2. Brush Up Rudimentary Camping Skills
There are some basic skills you need to know before you go out backpacking, like how to set up a tent, light fire, etc. Practice many times, especially with the gears you’re going to take with you.
3. Do Your Research
Scout the trail before you choose it. Thanks to the internet, you can now find out about the camping spots (if there’s any), wildlife, weather, water sources, etc.
4. Inform the Travel Plans to Your Nearest Ones
Only your closest ones, whom you trust the most, should receive a detailed itinerary of your travel. Keep your plans hidden from strangers, especially.
5. Take a Medical Kit
Anything can happen on a backpacking trip. Minor cuts and injuries can be treated with a simple medkit. If you have a health condition, pack your meds accordingly. But it’s safer to consult with your doctor whether this health condition will cause problems for you on the road or not.
6. Take a Strong Communication Medium
If you can’t get a strong signal, the GPS and your smart devices will be of no use. Carry a shortwave radio with a positioning system so that rescuers can track you down if you’re in trouble.
Backpacking Destination in the USA

The US is a vast country, with a plethora of hiking sites in each state. Any of them can be on your bucket list. I’m listing 5 hiking trails that you must check.
1. Grand Canyon National Park
Grand Canyon has been a popular hiker’s destination for a long time. Every year people swarm to see the 446 km long trail. You can see it from the south or north rim. While climbing 7000 feet above ground to the south rim, you can visit the grand canyon village, railway, hermit road, desert view, etc.
The northern rim is a thousand feet higher than the southern one. If you wish to cross the canyon, you have to hop on an automobile for a 137 miles ride.
2. The Thunder Lake
For people looking to hike solo, the thunder lake can be a superb destination. Hiking through the forests, fields will definitely make the trip worthwhile. You can go bold and climb over 12000 feet to reach the Tanima peak. But you have to be skilled with a compass and a map to stick to your trail.
3. The Wonderland Trail
If you’re an avid backpacker, you must give this trail a visit. It usually takes 7-10 days to complete the trail, but you can go faster if you’re up to the challenge. The established campsites have great facilities. But you’re only allowed to camp in the campsites. Read this Wonderland Trail Backpacking Guide
4. Enchanted Valley
The name says it all. How does a valley with 10,000 waterfalls sound as your next destination? It’s a 30-mile roundtrip with a beautiful rainforest too. But beware of bears!
5. Ridge Trail
Sometimes you might wish to take it slow and walk along the countryside. This trail at the National Historical Park can offer so much, both from historical and natural viewpoints. You can finish the trail in 2-3 nights if you’re a pro.
There are lots of different sites to see, like the Indian rock shelter, Skylight Cave, the beautiful Sand Cave, etc.
Why Should I Choose Backpacking?
Going out to live in the wild with a single backpack may sound crazy at first, but there are ample reasons why adventurers long for a scope to go backpacking.
1. Adventure of a Lifetime
The more memorable, meaningful experiences are achieved through backpacking. Having the privilege to witness the sheer magnanimity of mother nature, and the realization that your feet carried you all the way here is truly unreal.
2. Develops Confidence
One thing is sure you’ll never remain the same after a backpacking trip. The main idea of backpacking is that we can survive in the wild with minimum stuff. Other challenges of life look pale in comparison with this one. You’ll truly believe that you can achieve anything if you can complete trails by yourself.
3. Offers a Time Off
The noise and excitement of the cities are enough to drive anyone crazy. It’s nice to just take time off, slow down and run with nature. The pleasing nature sound is unlike anything you’ll ever hear. It’s enough to freshen up and truly heal your mind.
4. Create Bonds
People will reveal their truer, nobler side to you once they know that you trust them. Hiker, in a group, develops that trust and shares a bond that’s unique and permanent. You just have to find the right companion to travel with. Hikes can be arduous, but the sense of camaraderie makes it so much easier.
5. Makes Us Value Life More
Having to cook your own meal, washing your own dish, carry your own weight will amp up your self-esteem and let you unlock a deeper understanding of life. You’ll be able to truly see yourself in a new light and respect yourself. Backpacking is a surefire method of shooting down depression and insecurities.
Final Words
So, this was my complete backpacking guide. Backpacking will always be possible by the person who’s committed to it. If you wish to truly live and enjoy life, you need to step aside from civilization every once in a while. Pack your bag, lock in the coordinates, and just keep walking.